How to Create a List View in Salesforce
Quick intro:
Salesforce allows you to filter your records based on any field using List Views. List views are an effective way to display small sizes of data. List views can be used to split up records in lists according to our convenience. Additionally, custom list views can be effective in streamlining tasks and processes.
In this article, we aim to provide you with a step-by-step tutorial on how to create a list view in Salesforce.
How to Create a List View in Salesforce
Let’s take a look at the steps required to create a list view in Salesforce:
Step 1: Log in to Salesforce
Let’s begin by logging in to your Salesforce account.

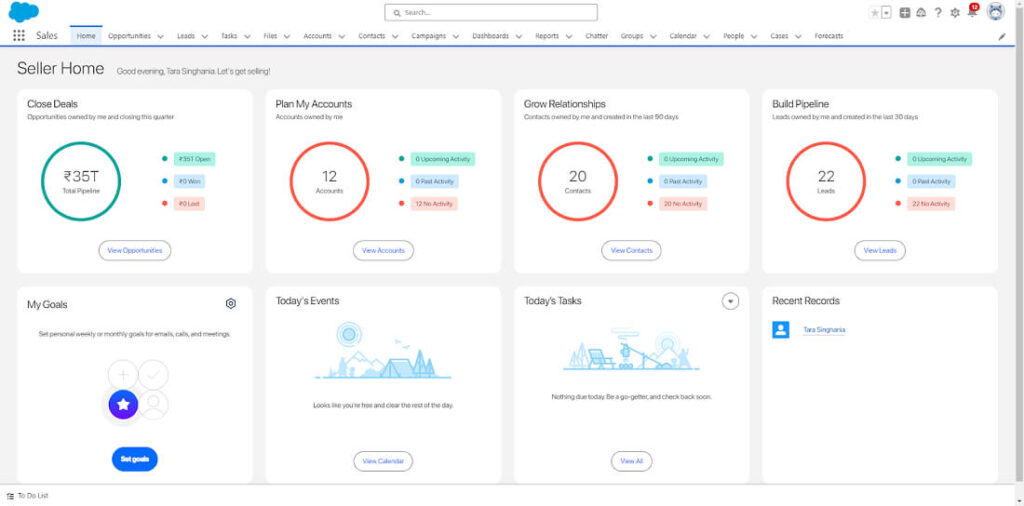
Once logged in, you’ll be directed to the Salesforce homepage. This is how your homepage will look like.
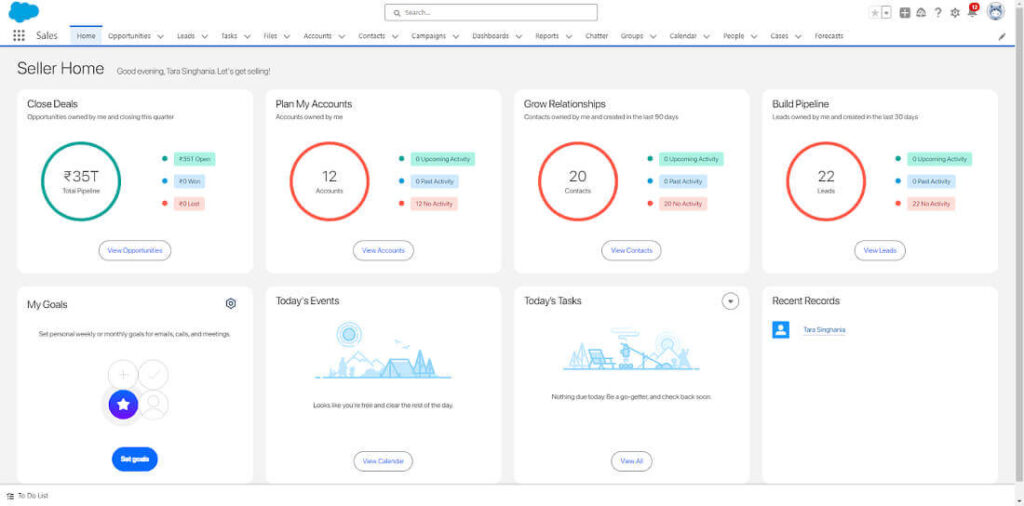
Source: Personal screenshot
Step 2: Navigate to the Accounts Tab
In Salesforce, log in and navigate to the Accounts tab. This is where you’ll manage your account data.
You can create similar list views for other Salesforce objects like contacts, opportunities, and leads.
Step 3: Access List View Controls
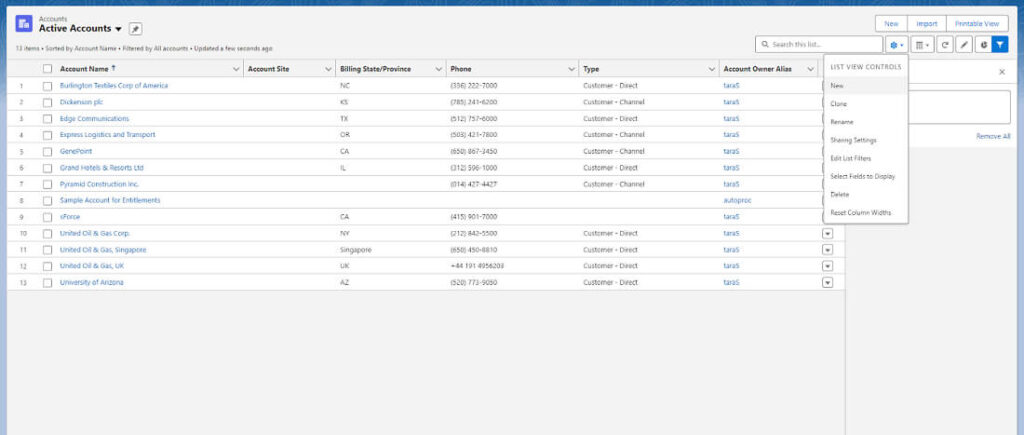
Look for the List View Controls button on the right side of the screen. It’s usually a gear icon (⚙️). Click on that button.
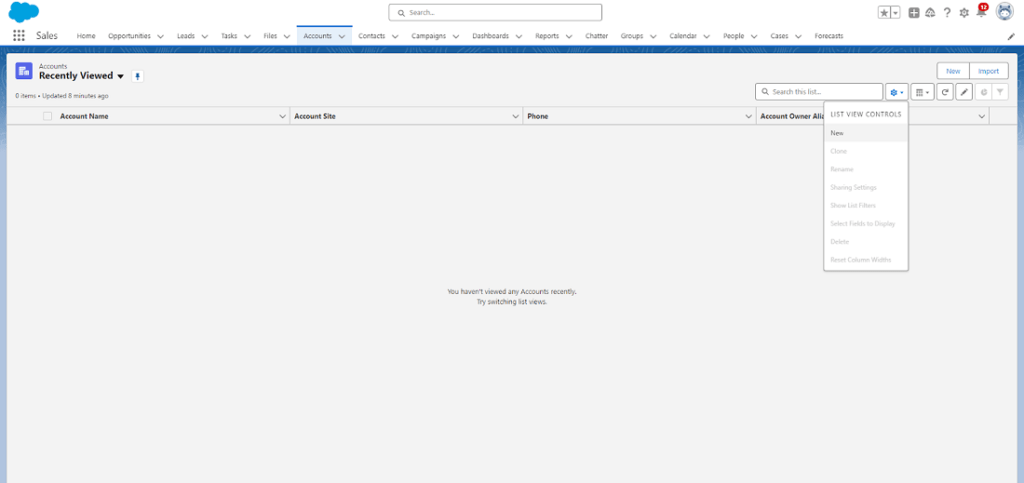
Source: Personal screenshot
Step 4: Create a New List View
From the List View Controls menu, select New. This will initiate the process of creating a new list view for your accounts.
Step 5: Name Your List View
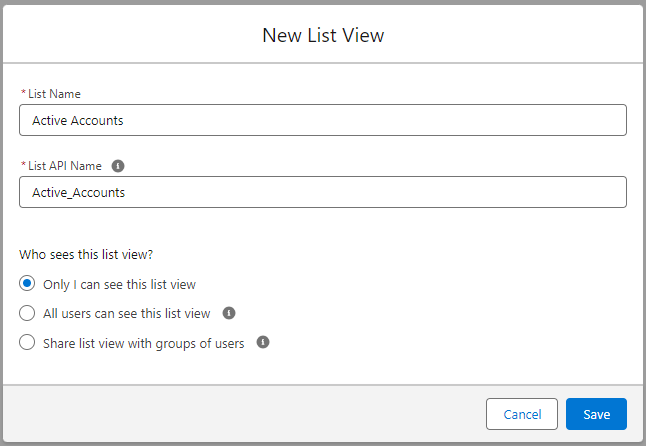
In the Name field, enter a clear and descriptive name for your list view. This will help you easily identify its purpose later.
For example, you could name it “Active Accounts”. The List API Name will be entered directly once you click Enter.
Step 6: Set Visibility
Source: Personal screenshot
Choose who can see this list view. Here are your options:
- Only I can see this list view: Ideal for sensitive information or test views.
- All users can see this list view: Suitable for general-purpose views.
- Share list view with groups of users: Grant access to specific user groups.
For this article, the option selected is “Only I can see this list view”.
Step 7: Save the Basic List View
Click Save. This creates a basic list view displaying all your accounts.
Source: Personal screenshot
Step 8: Customize the View (Optional)
The filter panel will be available by default. But if you want to further refine your list view, you can click on the gear icon (⚙️) again.
Here, you can select either of the options as shown below.

Source: Personal screenshot
1. Select Fields to Display
You can click on the “Select Fields to Display” option from the list. Choose the specific fields you want to see in the list view. For this article, the option selected is the “Annual revenue” option.
Click on the middle arrows to move the fields from “Available fields” to “Visible Fields”.

Source: Personal screenshot
2. Filters
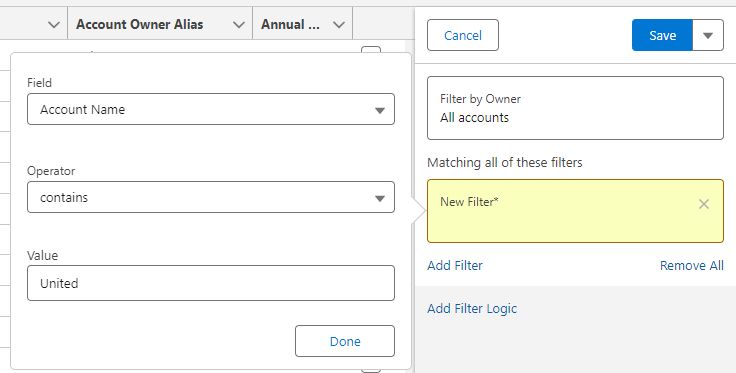
You can click on the “Edit List Filters”. Apply filters to narrow down the accounts based on criteria (e.g., accounts created this month, accounts in a specific industry).
You can use various filter conditions like comparisons, dates, and text searches. For example, you can use the keyword “United”.

Source: Personal screenshot
Source: Personal screenshot
3. Sorting
You can also sort the accounts by a particular field (e.g., by Account Name alphabetically or by in descending order). This can be done by clicking on the particular field header once.
You can see the (↓) for descending and (↑) for ascending incase of numerical values.
Once you have customized your list view according to your needs, you can use it effectively to:
- Quickly see relevant information based on your filters and avoid walls of data.
- Perform bulk operations (such as sending emails and modifying data) on the accounts that are displayed.
- Create reports and charts based on the filtered data.
By following these steps, you can create customized list views in Salesforce to manage your accounts efficiently. You can also create similar list views for other Salesforce objects.
Utilize the list view feature in Salesforce by working on different tabs like contacts, opportunities, and leads.
Source: Personal screenshot
And you are done. You can play around with the different customizable options in the settings option as per your need.
Wrapping Up
List views are a powerful tool that allows you to filter and customize the data you see in Salesforce. This can help enhance your productivity by quickly giving you the information you need instead of manually going through huge amounts of data every day.
Customize list views by selecting fields to display, applying filters, and sorting to further enhance your productivity.


