25, September, 2024

At BestCRMSoftware.com, we prioritize transparency and honesty in all our content. In order to maintain the quality of our reviews and to keep providing valuable information to our audience at no cost, We earn commissions through clicks and affiliate purchases from select links in our articles.
Our commitment to unbiased content remains unwavering, despite our use of affiliate links. These links do not influence the opinions or recommendations provided by our editorial team. We prioritize integrity and objectivity in every piece of content we produce, ensuring that our readers receive unbiased and reliable information to inform their decisions effectively.
How to Create a Sandbox in Salesforce

Biography
Stephen Jones is a seasoned Customer Relationship Management (CRM) professional with over 7 years of experience in the field. Throughout his career, he has helped businesses of all sizes implement and optimize their CRM systems to drive sales growth, improve customer satisfaction, and streamline operations. Stephen is passionate about sharing his CRM expertise and insights through insightful blog posts and articles.
View Author Profile

Biography
Mark Sempolsky leverages his experience as a Product Owner (PO) at a leading design agency to provide insights on CRMs for creative teams on our blog. Having navigated complex design workflows and client relationships since his intern days, David focuses on how CRMs can streamline communication, boost project management, and fuel creative success within design agencies.
View Author Profile
Latest Update:
Sep 16, 2024, 8:45 am
Editorial Note:
We might earn a commission from partner links on BestCRMSoftware.com. These commissions do not affect our writers and editors’ opinions or evaluations.
Quick introduction:
As a developer, have you ever wished you could tinker with Salesforce settings without impacting your live data?
Sandboxes are your answer! These isolated environments act as testing grounds for customizations and new features.
In this guide, we’ll walk through how to create a sandbox in Salesforce. We’ll also cover the key steps, making it easy for all developers new to Salesforce to build their test playground with sandbox templates.
Step-by-Step Process On How to Create a Sandbox in Salesforce
Creating a Sandbox involves a few simple actions. Here is a step-by-step guide on how to create a sandbox in Salesforce:
Step 1: Access Developer Sandbox Settings
- Login to your Salesforce account with your username and password.

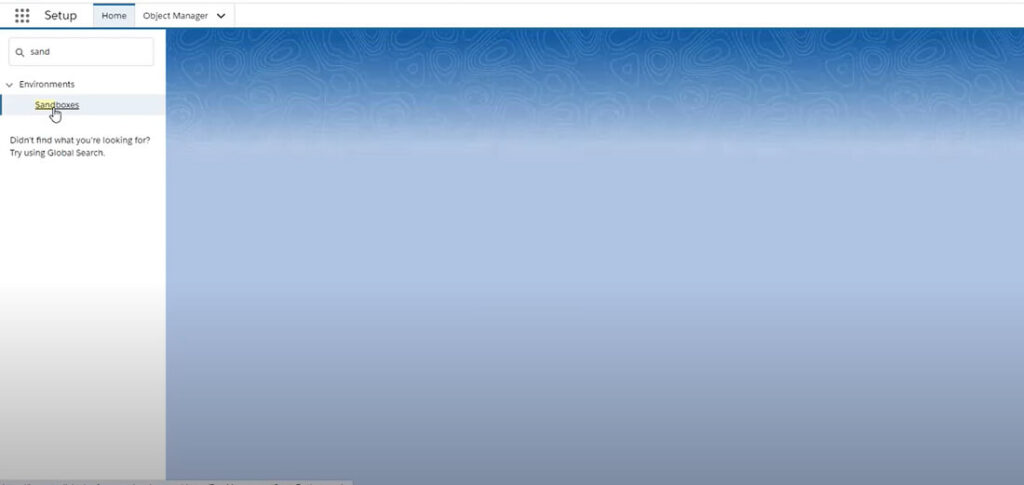
- After logging in with your username, click the gear icon in the top right corner and then click on setup to activate new sandbox templates.

- In the Quick Find box, type “Sandboxes” and hit Enter.
Step 2: Create a New Sandbox Template
- Click the “New Sandbox” button.

- Give your sandbox environment a clear and descriptive name and add a brief description.

- Next, make sure to select particulars from the Create form drop-down.
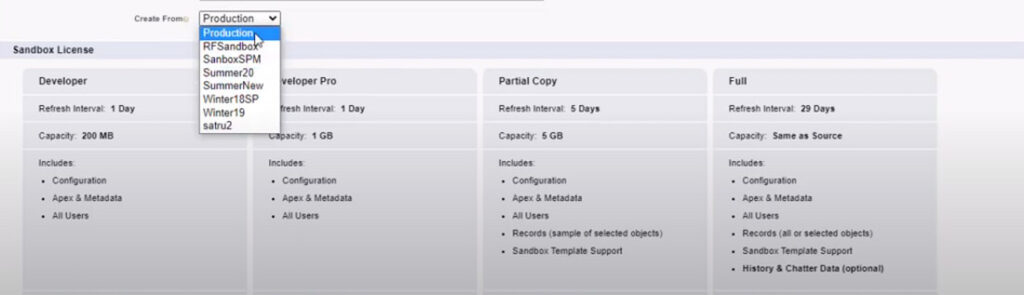
Step 3: Choose Your Sandbox Type
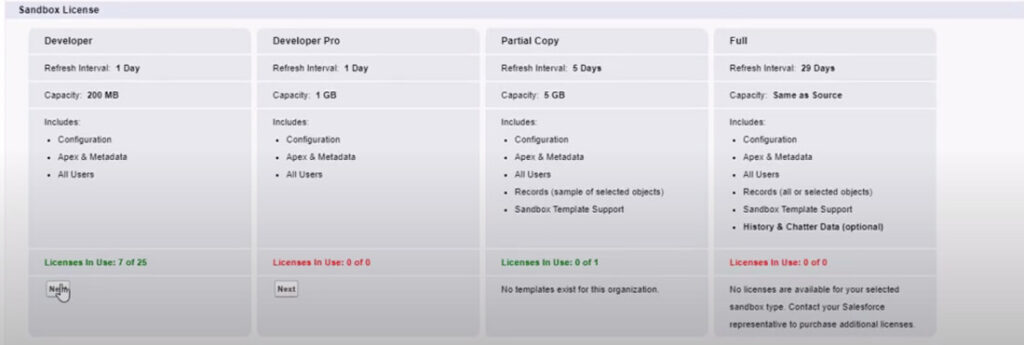
Here, you’ll decide what kind of data copy you want in your sandbox. Three main sandbox options exist:
| Type | Description |
| Developer Sandboxes | The developer sandbox option copies your organization’s metadata, not actual files. It is perfect for testing customizations without affecting actual records. The Pro option gives you more data storage limits. |
| Partial Copy Sandbox | The partial copy sandbox lets you pick specific objects and data to copy along with the metadata. It is functional if you need some sample data for a testing environment. |
| Full Sandbox | This is a complete copy of your production org, including all data and metadata. It is great for disaster recovery scenarios but not recommended for everyday load testing due to resource limitations. |
Step 4: Configure and Create Your Full or Partial Copy Sandbox Templates
Depending on the sandbox type, users might see additional sandbox options here. This step can be skipped if you’re using the developer sandbox template.
- Advanced users can specify a custom Apex class to configure the sandbox after creation.

- Once you’re happy with your settings, click “Create.” Your sandbox will be created in the background.

Tips & Tricks
Here are some tips you can follow when creating a sandbox in Salesforce:
- Choose clear and descriptive names for your sandboxes to quickly identify their purpose later.
- When creating a partial copy sandbox, include the objects and data most relevant to your testing needs. This will reduce the sandbox’s size and creation time.
- If you’re working with a team, consider using version control systems like Git to manage sandbox changes and monitor multiple testing iterations.
Wrapping Up
Creating a Salesforce sandbox allows you to test new features and customizations in a safe, isolated sandbox environment. This encourages innovation while protecting your valuable production data.
If you follow the steps on how to create a sandbox in Salesforce and keep these tips in mind, you’ll be well on your way to effectively creating and utilizing sandboxes throughout your Salesforce developer career.
Recommended Articles


19, September, 2024

17, September, 2024