How To Create An Email Template In Salesforce
Quick introduction:
Email communication is now an integral part of digital marketing to connect with prospective customers, build brand awareness, foster customer loyalty, and generate sales.
To stand out in a constantly crowded email inbox, Salesforce email templates are a powerful way for businesses to create, customize, and send emails to individuals or a list of recipients.
Salesforce Lightning email templates enable users to send clean, personalized emails to leads, customers, and prospects efficiently and consistently.
In this guide, we will explore how to create an email template in Salesforce Lightning, how to enable Content Builder, how to set up email templates, and more.
What Are Email Templates In Salesforce Lightning?
Salesforce Lightning email templates enable users to create and send customized emails with predefined email content, merge fields, and enhanced letterhead to help send emails quickly and seamlessly.
Whether you are looking to send emails to individuals or a group of recipients, Salesforce email templates help automate email communication, save time in email marketing, maintain email consistency and branding, as well as reduce errors.
How To Enable Salesforce Lightning Email Templates
Salesforce Lightning comes with a built-in email template builder on the platform that allows users to drag and drop email elements to create email templates without writing any HTML code. As opposed to Salesforce Classic email templates, Salesforce Lightning has the email template builder baked in.
However, email templates in Lightning are not enabled by default. To set up Lightning email templates, simply follow the steps outlined below.
1. Enable Template Folder Sharing in Salesforce Lightning
- Navigate to “Setup” and search for “Lightning Email Templates” in the Quick Find box.
- Toggle “Folders and Enhanced Sharing” on.

2. Select Which Users Can Create And Share Email Template Folders
To select which users can create email template folders, Admins and users with the “Modify All Data” permission can follow the steps below:
- Navigate to “Setup”, enter “Permission Sets” in the Quick Find box, and select “Permission Sets.”
- Click on one of the standard permission sets, and then select “System Permissions.”
- Click “Edit”, then select “Create Folders for Lightning Email Templates”.
- Once you have finished configuring, click “Save”.
Note: This permission setting can be enabled at the profile level as well.
3. Enable Content Builder In Lightning
- Create a new Permission set.
- Under “System”, click on “System Permissions.”

3. Tick “Access drag-and-drop content builder”, then click Save.
4. Apply to the users for whom you want this feature enabled.

5. Wait for about 15 minutes for this feature to be enabled in the system. Alternatively, you can log out and log back in.
6. When you view your Lightning templates list and want to edit an existing template, you will now see the “Edit in Builder” option.
How To Create Email Templates In Salesforce Lightning
1. Click on the App Launcher icon (nine dots in a square) located in the top-left corner and search for “Templates” in the App Menu.

2. Click on “Email Templates”.
3. Once the email templates page opens, click “New Email Template” for another window to open.
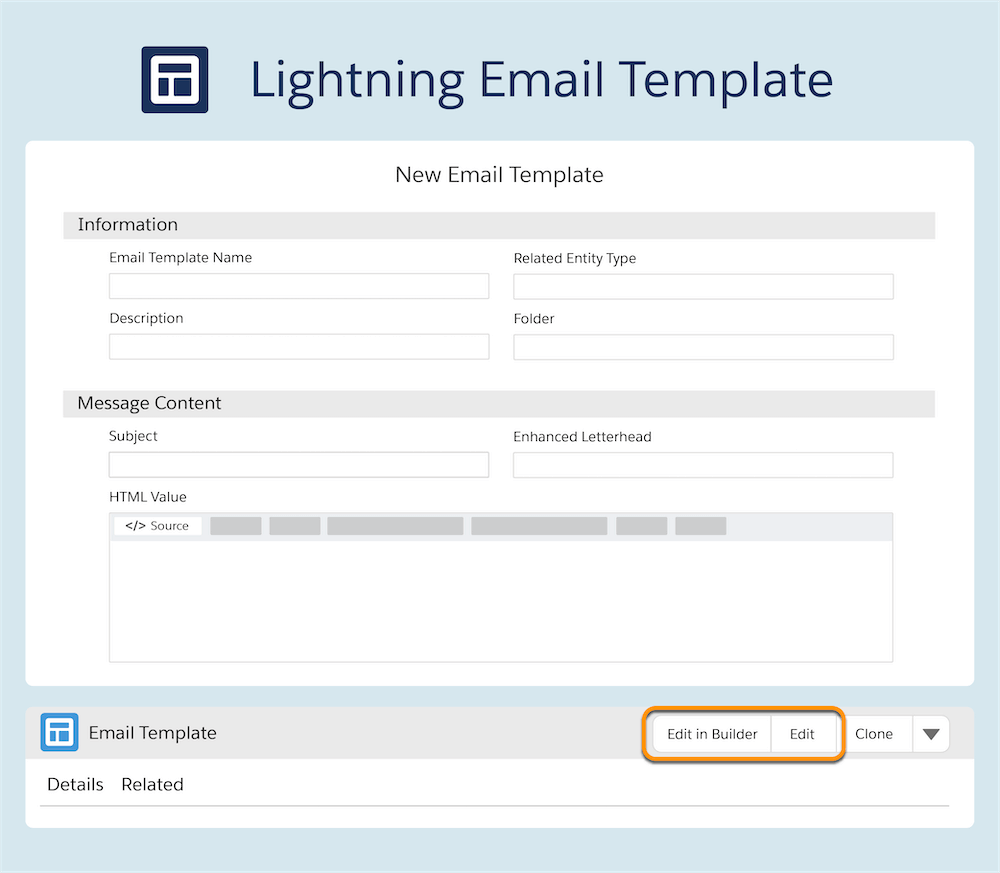
4. In the New Email Template window, enter the details about your template such as a name and subject line. You can also choose the object that the new template relates to and where it should be saved. Once you are done, click “Save.”

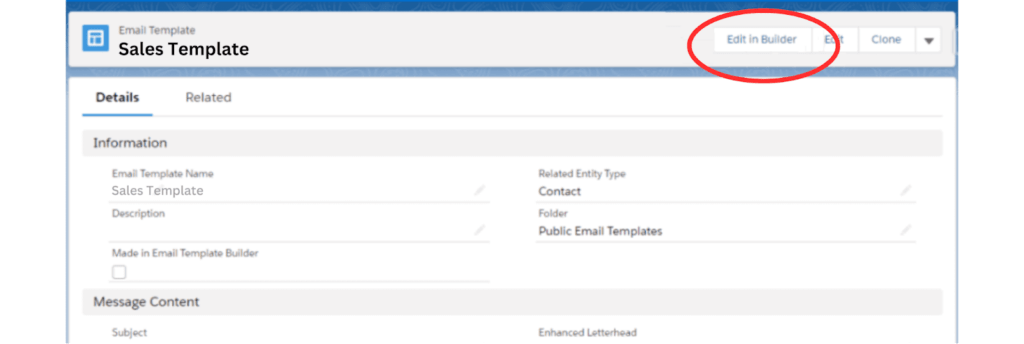
5. In the new page that opens up, click the “Edit in Builder” button.
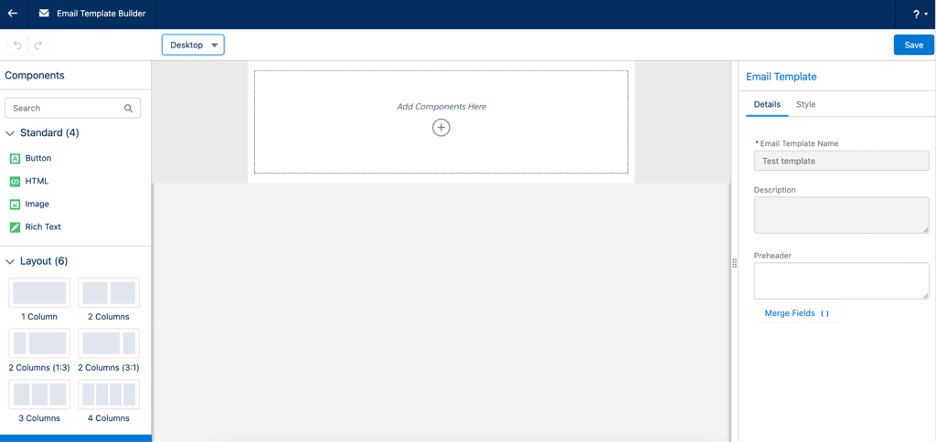
6. In the Lightning Email Template Builder, you can add and customize different components in the template using the sidebar’s properties panel. There are various drag-and-drop components available for users to choose from and customize.

- Background color: To change the background color, go to “Style” and click the color selection box. Change the email background color by typing in the hex code.
- Images: To add an image to email templates in Salesforce Lightning, simply drag an image component from the sidebar to the email canvas.
- You can also include merge fields for rich text, adjust the margin, color, image width, and more.
7. Once you have finished customizing the template, click “Save.” Then, click the “Back” icon to return to the Email Template page.
Now, users can use the new email template in an Email Alert or directly when creating a new email.
When creating a new email, navigate to the bottom of the email screen, and click the template button to select the template you would like to use.
Lightning Email Template Builder Guidelines
There are a few key points to keep in mind when using Lightning Email Template Builder:
- Merge fields: To insert merge fields in the subject line, you will have to type them in manually.
- Images: To insert a Salesforce File as an image, use the “Select From Files” button. When you save the template, all images are converted from Content Document links to Content Asset links.
- The image upload selector does not work when you are editing a rich text editor component in Source Mode.
- SVG image types are not supported in the Email Template Builder.
Wrapping Up
Salesforce Lightning email templates are a great way to amp up your email marketing game efficiently and seamlessly to reach your digital marketing goals.
With these simple yet powerful techniques, you’re equipped to effortlessly design custom email templates within Salesforce. Enhance your communication strategy and streamline interactions with clients and colleagues alike.


