How to Create an Opportunity in Salesforce
Getting started:
Salesforce is a cloud-based software company that provides Customer Relationship Management (CRM) software and applications that primarily focus on Sales, e-commerce, analytics, marketing automation, customer service, and application development.
Salesforce CRM is dominating the sales world owing to its versatility and ability to cover all the activities under one umbrella. It helps the sales team to automate, monitor and manage sales processes efficiently with significant improvement in their customer business.
In this fast-paced world, it is imperative for sales representatives to track every detail of the leads they wish to convert into potential clients. When a lead is converted into a deal, an opportunity is created.
Thus, an opportunity is nothing but a deal in progress that helps sales representatives track the number of potential sales by understanding the competitors for the accounts they are responsible for.
Let’s look at the step-by-step process of creating an opportunity in Salesforce in just a few clicks.
Step-by-step Guide to Create an Opportunity in Salesforce
Step 1
Log in to your Salesforce account with your login credentials.
Step 2
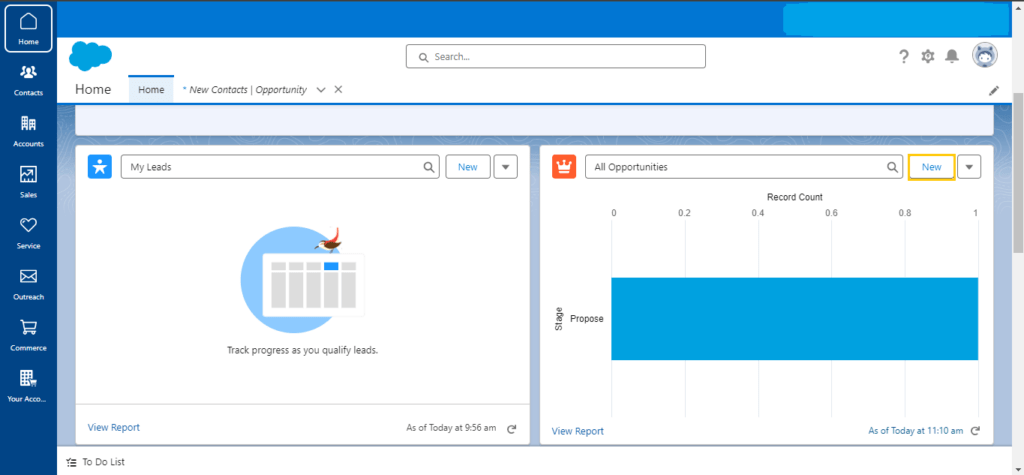
To create a new opportunity, click the New button next to the All Opportunities tab on the homepage.

Source: Personal Screenshot
Step 3
Clicking New will take you to the new opportunity page. Fill in the required details such as Opportunity Name, Account Name, Close Date, Stage, and Forecast Category.
These are mandatory fields. Scroll down using the sidebar to see the remaining fields.

Source: Personal Screenshot
Step 4
Select the account you want to use. If there is no existing account, then create a new account by clicking the New Account tab available in the drop-down menu.

Source: Personal Screenshot
Step 5
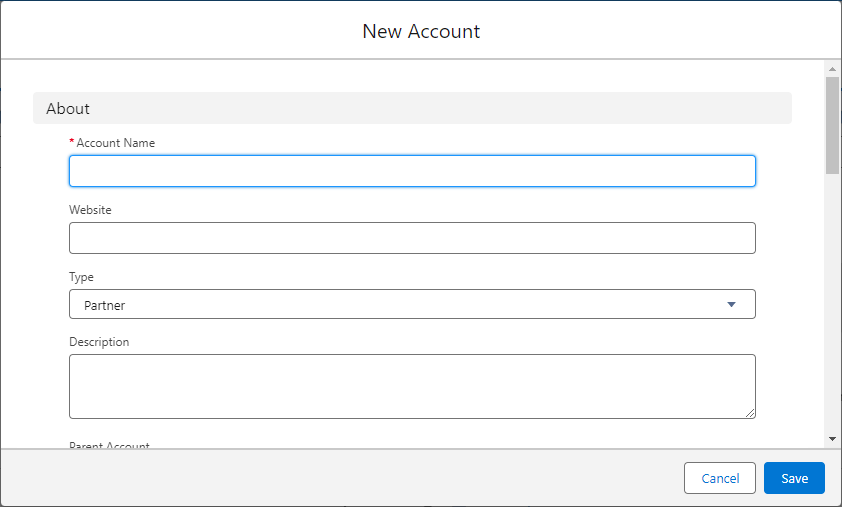
Fill in the required details to create a new account such as Account Name (this is a mandatory field) and other details in a specified field.

Source: Personal Screenshot
Step 6
Click Save to save the new account details.
Step 7
Once all the required details are filled, click the Save button to save the new opportunity. Alternatively, you can also click Save and New to create another opportunity.
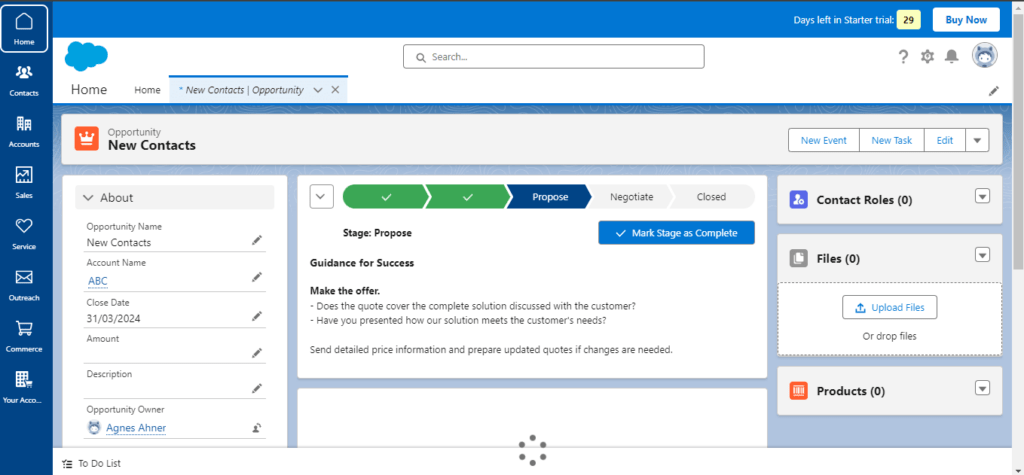
A ‘New opportunity created’ pop-up will appear on the home screen.

A new opportunity window will now be visible on the home screen.

Source: Personal Source
Final words
Utilizing customized product options, an Opportunity presents sales reps with an effective means to swiftly close deals.
As the deal progresses towards the proposal stage, use opportunities to explore various functions such as call logs, jotting down important notes during customer meetings, creating tasks for key activities, sending emails, and many more to expedite your work.
Finally, update the opportunity record with the current stage as you progress with deals from one stage to another.


