How to Filter Records in Hubspot CRM
In your daily work as a HubSpot CRM user, you may be managing a lot of customer data—contacts, companies, deals, and more. While having this information at your fingertips is invaluable, it can also be overwhelming. The key to maximizing the effectiveness of HubSpot CRM lies in its robust filtering capabilities.
This guide will equip you with the knowledge of how to filter records in Hubspot CRM data. With the expertise of a seasoned user, you can pinpoint the exact information you need in a flash.
Understanding Filtering Fundamentals
To get the most out of filtering in HubSpot CRM, it’s crucial first to grasp the fundamentals. Let’s start by exploring what filtering means.
What is Filtering?
Filtering allows you to narrow your view of CRM data based on specific criteria. Imagine sifting through a pile of sand to find seashells – filtering helps you identify the “seashells” (relevant data) amidst the “sand” (all your CRM records).
Benefits of Filtering
Here are some of the benefits of filtering records included in Hubspot CRM:
- Cut through the clutter to discover what you need quickly. Filtering allows you to focus on certain client categories, which saves you a lot of time.
- Create tailored marketing by screening contacts based on their interests or behavior.
- Analyze purchase history and activity, and spot patterns to better understand your consumers.
- Filter your data to determine what works and what doesn’t. Use this information to make educated decisions that promote business success.
Step-by-step Guide on How to Filter Records in HubSpot CRM
Now, let’s delve into the practical steps of filtering your HubSpot CRM data:
Step 1: Choose the Data You Want to Filter
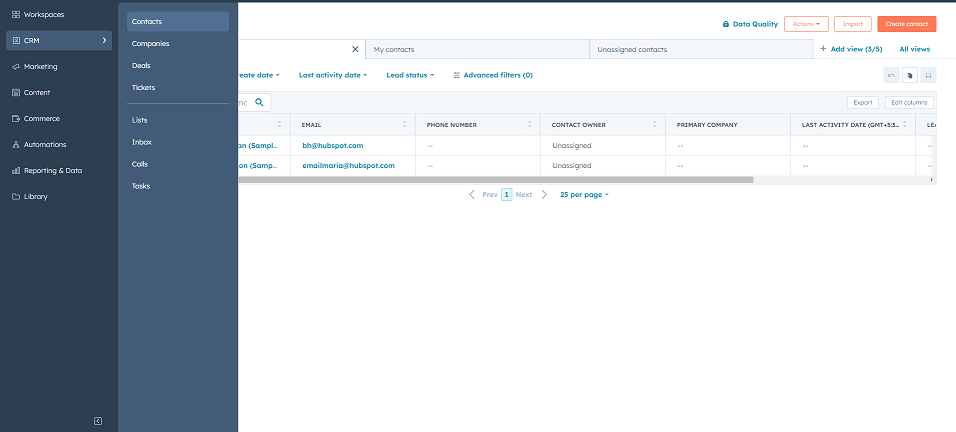
- The first step is to head to the specific section of your CRM where your desired data is present (e.g., Contacts, Companies, Deals).

- Next, look for the “Filters” option or associated records with property names (e.g., Contact Owner, Lead Status).
Step 2: Understanding The Drop Down Menu

- Many object index pages (like Contacts or Deals) display default property dropdown menus at the top. These menus allow you to quickly filter records based on shared properties like Lifecycle Stage or Created Date. Select the desired property and choose a value from the dropdown menu.

- Sometimes, the default property dropdown menus only offer a limited selection. Clicking “More filters” or “Advanced filters” gives a plethora of extra filtering possibilities.

- Once you’ve selected your filter criteria, click the “Apply filter” button. Your filtered data will now be visible. Only the records matching your criteria will be displayed.
Step 3: Saving Your Filter Options

- After applying your desired filters, navigate to the “Save View” button in the top right corner.
- Select “Save this view.”
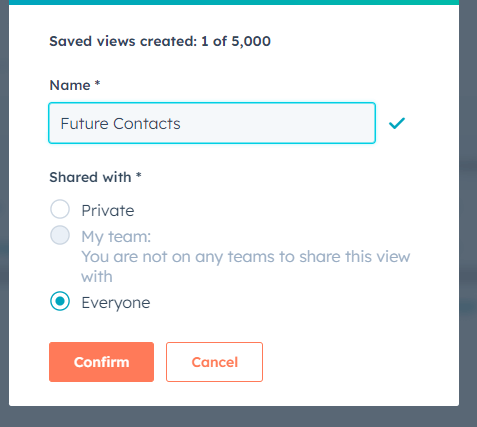
- Give your saved view a clear and descriptive name for easy identification later.
Advanced Filtering Techniques
HubSpot offers a range of advanced filtering options for truly granular control over your data:
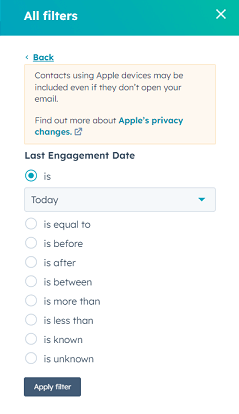
- Use operators like “greater than,” “less than or equal,” “contains,” and “is empty” to pinpoint specific data points.
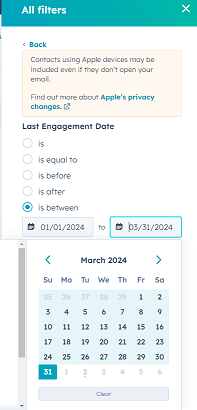
- Filter based on specific selected date ranges or timeframes to analyze trends or track activity windows. For example, you might want to identify deals closed “between Q1 and Q2 of this year.”
Filtering Activities on a Record Timeline
Focusing on specific interactions within a contact, company, or deal record can be immensely valuable. Here’s how to filter the activity timeline:
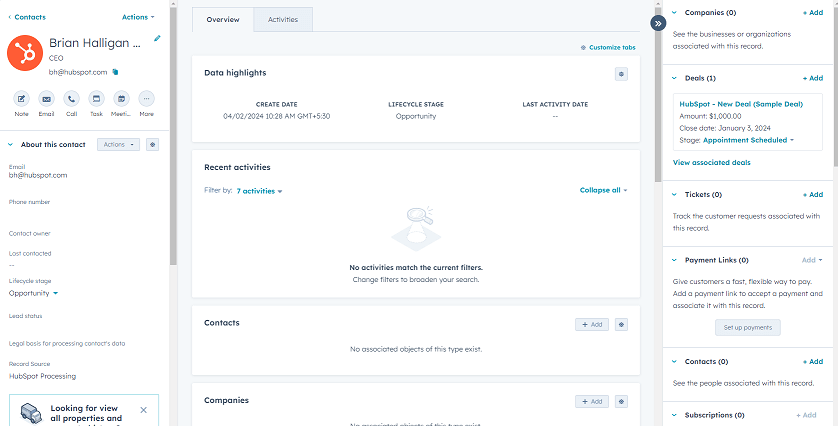
- Navigate to the desired record (e.g., a specific Contact).
- Look for the “Activity” tab within the record view. This tab displays a chronological associated record of all interactions with that contact.

- The “Filter Activity” dropdown menu allows you to filter activities based on specific types. You can view emails, calls, meetings, or any combination of these interaction types.

- For even greater control, you can refine the filter by including specific users or teams performing the activities. This allows you to pinpoint, for example, all emails sent by a particular sales representative to a specific contact.
By filtering your activity timeline, you gain a focused view of the most relevant interactions for a particular record, helping you understand the communication history and identify critical touchpoints.
Custom Objects and Filtering
HubSpot allows you to create custom objects to manage data specific to your business needs. Filtering these objects follows similar principles as standard objects (Contacts, Deals, etc.). Here’s what to keep in mind:
- Not all custom object properties are inherently filterable. Ensure the record’s property you wish to filter by has a value assigned and is set up as a filterable property within your HubSpot account settings.
- First, select the gear icon in the top right corner and then look for “Custom Object” under data management.
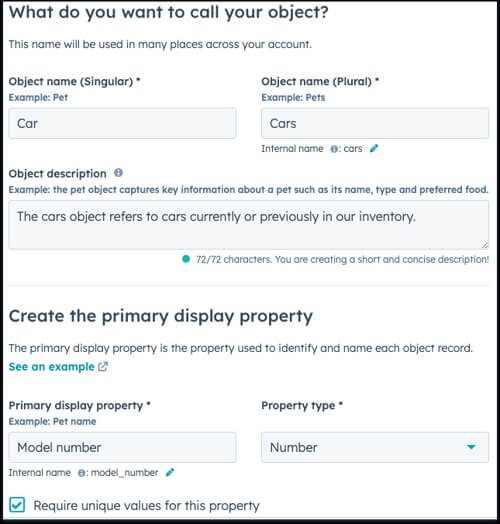
- Locate the specific custom object you want to filter. Like standard objects, the index page will likely display default property dropdown menus for quick filtering.
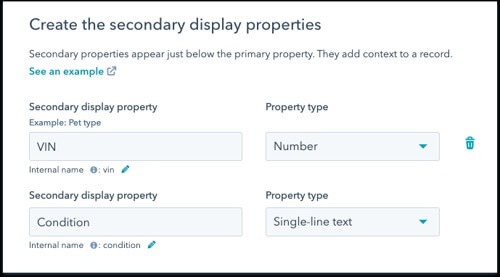
- As with standard objects, you can access a broader range of filtering options by clicking “More filters.” This allows you to filter custom object records based on various criteria, including dates, numerical selected values, or even specific text strings within custom property fields.
Additional Tips for Filtering Mastery
Here are some additional information that you can use to master filtering in Hubspot CRM:
- Remember the time-saving “Saved Views”? They gain considerably more value when used with sophisticated filtering. You may store filter combinations as custom views to access commonly used data segments rapidly.
- HubSpot lets you share existing saved views with your team members, encouraging collaboration and ensuring everyone can access the same filters. This simplifies operations and encourages data-driven decision-making throughout your organization.
- Feel free to combine different filters! You may use the “AND” and “OR” operators to construct precise filters that target extremely specific data segments.
- Explore the many filtering options and combinations to find the best solution for your needs. There is no “one-size-fits-all” approach; the optimal filter provides the information you need.
Wrapping Up
By mastering filtering in HubSpot CRM, you can unleash the full potential of your data. You may streamline operations and ultimately make data-driven decisions to advance your company.
Now you know how to filter records in Hubspot CRM. Apply what you’ve learned in this tutorial. Experiment with various filters and combinations to uncover important insights from your data. Remember, stored views are your allies; use them to save time and share filtered data with your team.


