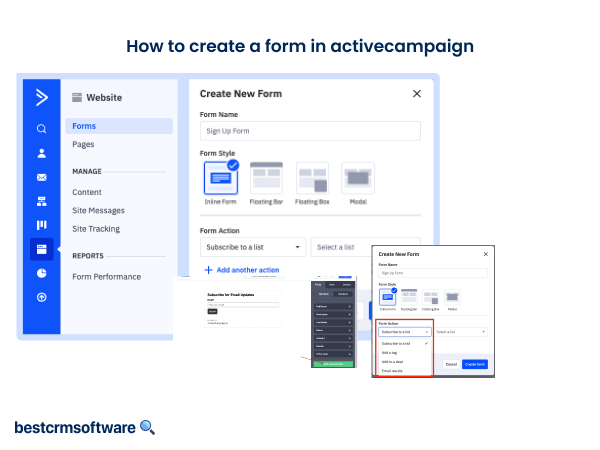
How to Create a Landing Page in ActiveCampaign
A landing page is one of the most widely used marketing tools. It converts visitors into leads by directing traffic toward a call to action. This strategy is highly effective because it helps increase conversion rates while lowering the cost of acquisition. ActiveCampaign provides the perfect solution with its user-friendly interface and easy-to-use inbuilt landing page templates.
Discover how to create a landing page in ActiveCampaign with ease, allowing you to design and publish seamlessly.
Step-by-Step Process to Create a Landing Page in ActiveCampaign
For enhanced lead generation, product sales, opt-in collection, and initiation of automated workflows, you can quickly create landing pages with ActiveCampaign Pages.
Step 1: Access the Pages Section

- To create a landing page in ActiveCampaign, navigate to the ActiveCampaign website and click ‘pages.’
- Click on the ‘start building’ button and then on the ‘add a new page’ button to load the template page.
Step 2: Select the Template

- From the available options, find the template you want to use and click on the ‘use this template’ button. This option will be visible only after you hover the mouse on the chosen template option. While hovering, you would also get the preview option.
- You can even start with the ‘blank’ template option.
Step 3: Name the Page

- After the template is loaded in the page builder, you will get the option to ‘rename page.’
- After renaming, click on the ‘save’ button.
Step 4: Customize Page Design

- In the page builder, customize the theme and layout of your page and add content.
- You will be able to do so with the use of page blocks.
- ‘Drag the block from the right bar to your layout’ to add blocks to your design.
Step 5: Edit the Page Theme

- Click on the ‘theme’ tab on the right page to customize the background, color palette, font family and sizes, and page layout.
Step 6: Add a Form
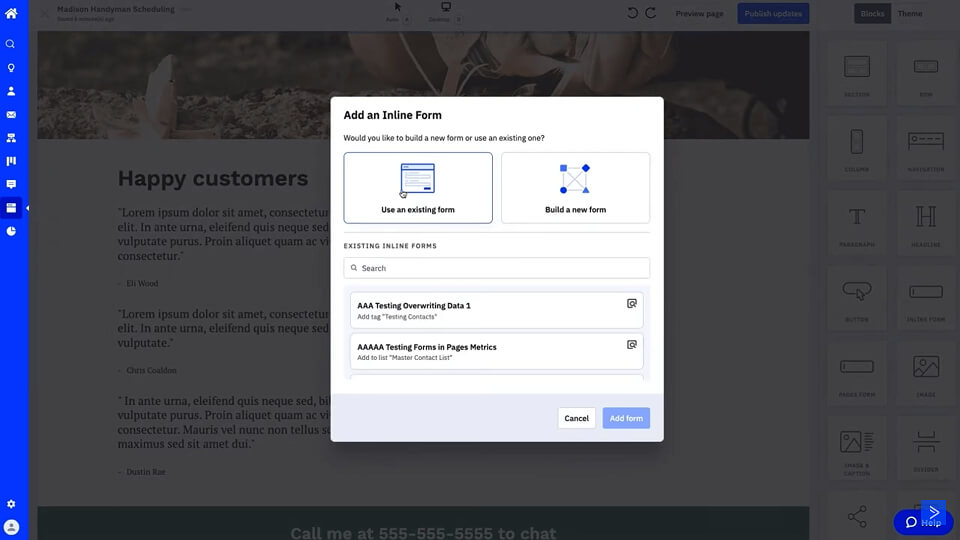
To generate leads and grow your email marketing lists, you must add a form to your landing page. The 3 ways in which you can add a form to your landing page are:
- Option 1: Drag the ‘inline form’ block to start creating an ActiveCampaign form from scratch. Next, choose ‘Create a new form,’ ‘Enter the form name,’ ‘Select the form action,’ and finally, click ‘Begin building your form.’
- Option 2: Drag the ‘Inline form’ block, choose ‘Use an existing form,’ and then select the desired ActiveCampaign form to add to your landing page.
- Option 3: Drag the ‘Pages form’ block to your landing page layout. However, with this option, you will not be able to opt-in contacts or add them to your email marketing lists. You can, however, collect email, phone, name, and information for some custom contact field types.
Step 7: Add Tracking and Analytics Code
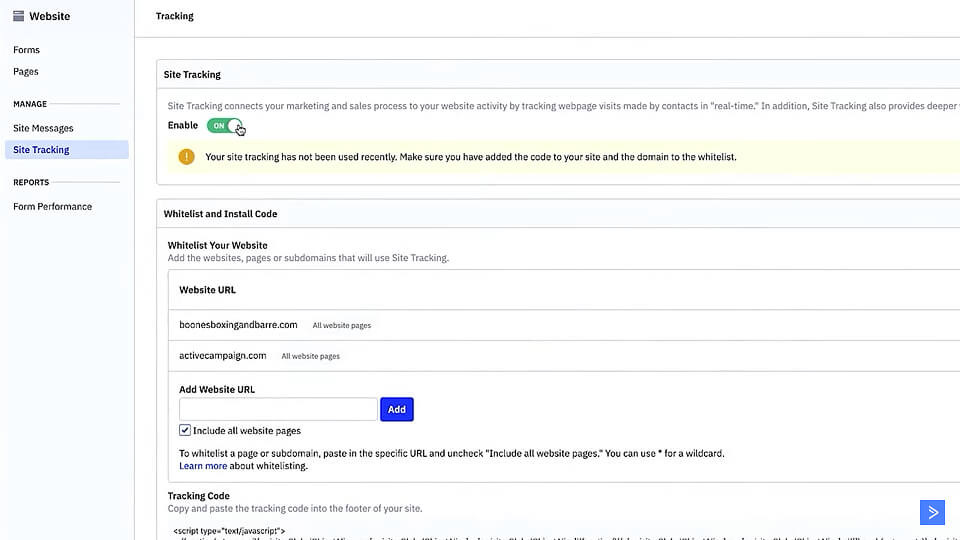
- After your landing page is published, go to the ‘tracking page’ option in your ActiveCampaign account.
- ‘Enable site tracking’ and ‘whitelist your domain.’
- If you use Google Analytics, go to ‘page setting’ and add the ‘tracking ID’ to your page. This will enable you to collect data about your page visitors.
Step 8: Set Meta Information
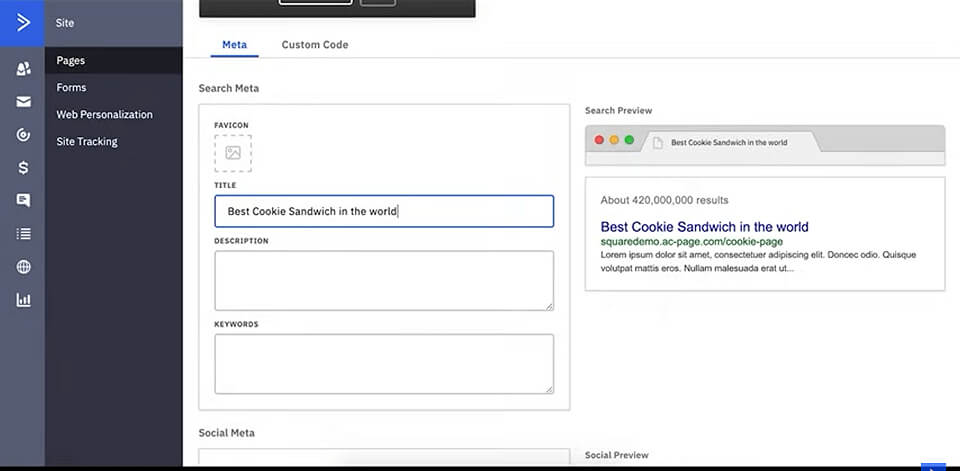
- From ‘pages,’ select the page you want to use and then click on ‘view page settings.’
- Then click on the tab of ‘meta’ to set your meta information.
Step 9: Publish Your Landing Page or Save It as a Template

- To save it as a template, click on the ellipsis next to the page name and click on ‘save as template.’
- To publish it, click on the ‘publish page’ button. Then, ‘select your domain’ from the drop-down menu and ‘type the URL’ in the next field. Then click the ‘publish’ button.
Wrapping Up
By following the steps outlined in this guide, master the art of creating impactful landing pages with ActiveCampaign to see a boost in conversions and sales and trigger automated workflows. With its user-friendly interface and robust features, unlock the full potential of ActiveCampaign and elevate your brand’s online presence today.


