
25, July, 2024

At BestCRMSoftware.com, we prioritize transparency and honesty in all our content. In order to maintain the quality of our reviews and to keep providing valuable information to our audience at no cost, We earn commissions through clicks and affiliate purchases from select links in our articles.
Our commitment to unbiased content remains unwavering, despite our use of affiliate links. These links do not influence the opinions or recommendations provided by our editorial team. We prioritize integrity and objectivity in every piece of content we produce, ensuring that our readers receive unbiased and reliable information to inform their decisions effectively.
Step-by-Step Process to Create Keap Opt-in Form

Biography
Stephen Jones is a seasoned Customer Relationship Management (CRM) professional with over 7 years of experience in the field. Throughout his career, he has helped businesses of all sizes implement and optimize their CRM systems to drive sales growth, improve customer satisfaction, and streamline operations. Stephen is passionate about sharing his CRM expertise and insights through insightful blog posts and articles.
View Author Profile

Biography
Anna Rodriguez is a CRM consultant with 4 years of experience in helping businesses across various industries select, implement, and manage their CRM systems. She is skilled in CRM system customization, data migration, and user adoption strategies. Anna is passionate about helping businesses unlock the full potential of their CRM systems and fostering a customer-centric culture within organizations. She constantly keeps on top of the newest industry trends and holds a Bachelor's degree in Information Technology.
View Author Profile
Latest Update:
Jul 26, 2024, 1:21 pm
Are you looking for ways to add agility to your marketing campaigns? Do you want a fast and efficient way to gather customer information, process orders, and track interactions that help you achieve this goal? Your answer lies in learning to create Keap opt-in forms.
Infusionsoft by Keap CRM has a free plugin for WordPress users, enabling seamless integration of your digital marketing strategy with WordPress pages. This means that any time a user fills out your opt-in form on WordPress, they will be automatically added to Infusionsoft, triggering any automated campaigns you have set up.
Discover how to create Keap opt-in form with our comprehensive step-by-step guide.
Before creating a Keap opt-in form, ensure you have completed setting up your WordPress plug-in and identified where and how you want your opt-in form on your webpage. Also, determine the type of information that you want to gather from your website visitors through this form.
Let’s get started now!
Step 1: Log in to the WordPress Account

- Log in to your WordPress account and from the menu, click on ‘Infusionsoft‘ to expand the sidebar.
- In the expanded sidebar, click on ‘Opt-In Form.’
Step 2: Create a New Opt-in Form

- At the top right corner of the page, click on ‘New Opt-In Form.’
Step 3: Choose a Type of Opt-In Form

Select a type of opt-in form based on how you want it to function on your webpage. The different types of opt-in forms that you can choose from are:
- Inline: Here, the opt-in form is inserted either in the middle or anywhere else on your webpage.
- Locked Content: In this type of opt-in form, visitors are offered valuable content in exchange for their email addresses.
- Below Post: Here, the opt-in form is placed at the end of the page and targets visitors who have read the entire post and are very engaged.
- Widget: Here, the opt-in form is created for your footer, sidebar, or any other widget-friendly area on your webpage.
- Bar: In this type, you promote special offers and direct traffic to specific pages with eye-catching, top-of-page banners.
- Pop Up: Here, the opt-in form is set to appear after scrolling to a specific point on your page, spending a certain duration of time, making a purchase, or leaving a comment.
- Fly-in: This is a more subtle alternative to pop-up. Here, the opt-in form is set to fly in at the bottom of the page either after scrolling to a specific point on your page or after spending a certain amount of time.
Step 4: Set up the Opt-in Form
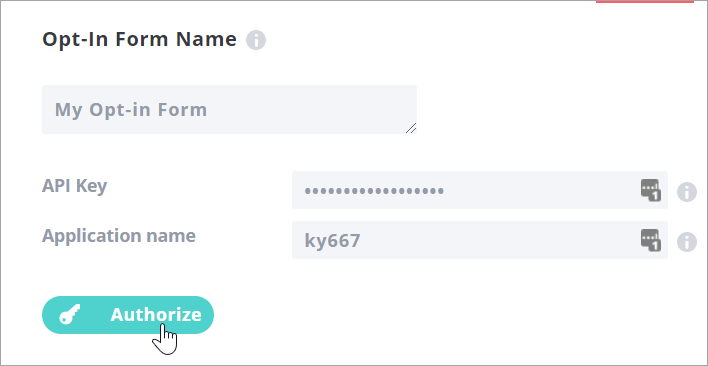
- Enter the ‘Name’ of your opt-in form and click on the ‘Next: Design’ button.
- Enter your legacy API key, app ID, and click on ‘Authorize.’
Step 5: Customize Your Opt-in Form
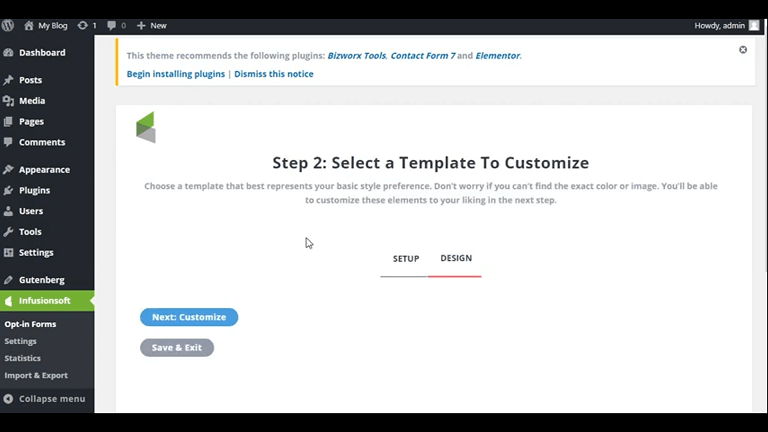
- Choose the ‘layout’ of the opt-in form and click on the ‘Next: Customize’ button at the bottom. You will be able to change the colors after selecting the template.
- Enter the fields that you want to collect through your opt-in form. Remember, email addresses are mandatory.
- To view your in-progress design, click on ‘Preview’ at the top right corner.
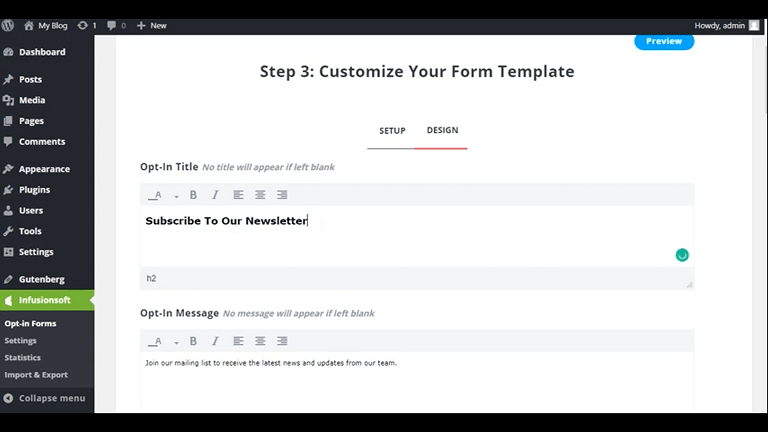
- To customize more elements, click on ‘Next: Display.’
- Select where you want to display the opt-in form.
Step 5: Save the Opt-in Form
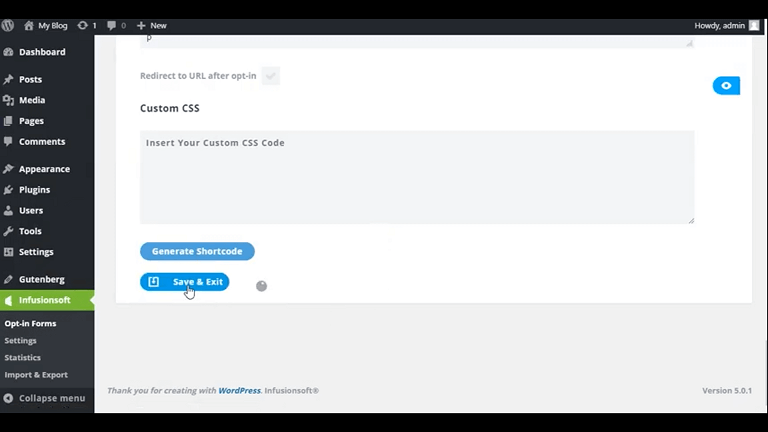
- After you have finished setting up the opt-in form, at the bottom of the display settings tab, click on ‘Save And Exit.’
- You will be able to see your new form in the tab of opt-in forms.
Create your Keap opt-in form today and effortlessly capture leads to boost your marketing campaigns, grow your business, and increase your revenue.
