How to Integrate Zoho CRM with WordPress
Are you looking to enhance your website’s lead generation and streamline customer management for business growth? Integrate Zoho CRM with WordPress—this powerful combo will streamline your workflow, centralize your data, and boost your sales!
With our step-by-step guide, learn how to integrate Zoho CRM with WordPress and make the most of both these platforms.
Step-by-Step Process to Integrate Zoho CRM with WordPress
Use Zoho Flow to automatically send information between Zoho CRM and WordPress without the need for manual coding.
Step 1: Connect Your WordPress Plugin to Zoho Flow
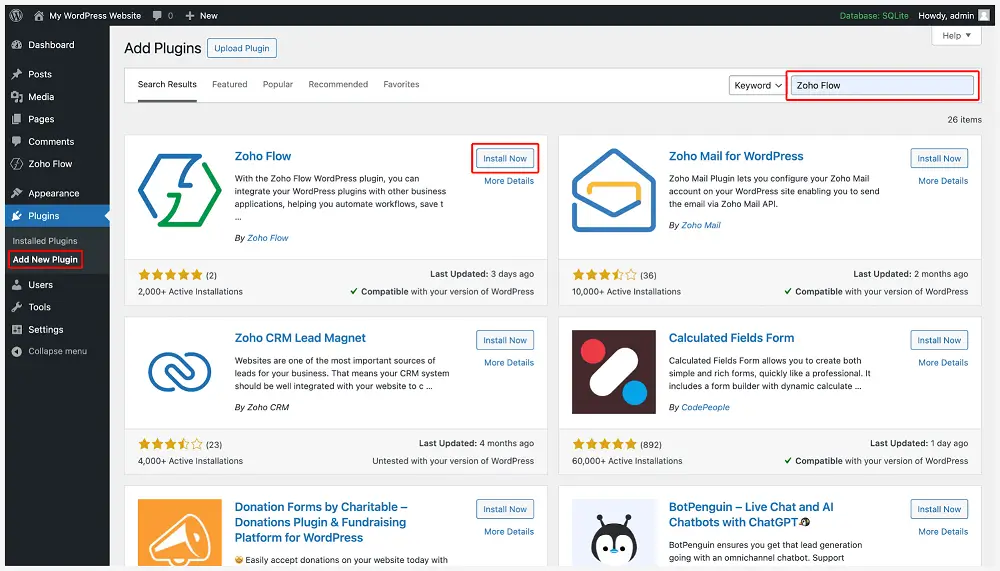
- Log in to your WordPress Account.
- On the left panel, click on ‘plugins’ and then click on ‘add a new plugin.’
- Search for ‘Zoho Flow’ and click on ‘Install now.’
Step 2: Activate the Zoho Flow Plugin

- Go to the ‘plugin’ menu in WordPress, find Zoho Flow, and click on ‘activate.’
- You can also download the Zoho Flow plugin and either use WordPress’s built-in plugin installer or extract the files into the ‘wp-content/plugins/’ directory within your WordPress installation.
Step 3: Create a Connection in Zoho Flow
- In Zoho Flow, ‘create a new flow.’
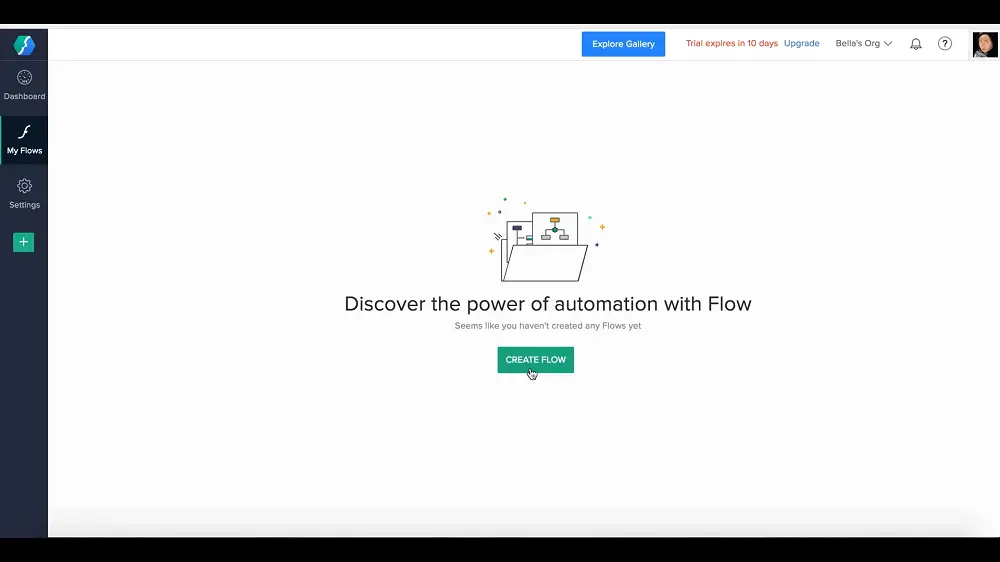

- Select a trigger or an action. If you select a trigger, click ‘next.’

- Click ‘new connection.’
Note: An alternative way to create a connection in Zoho Flow is to go to ‘settings’ > ‘connections’ > ‘create connection’ > ‘select your WordPress plugin.’
- Enter the ‘name of the connection.’
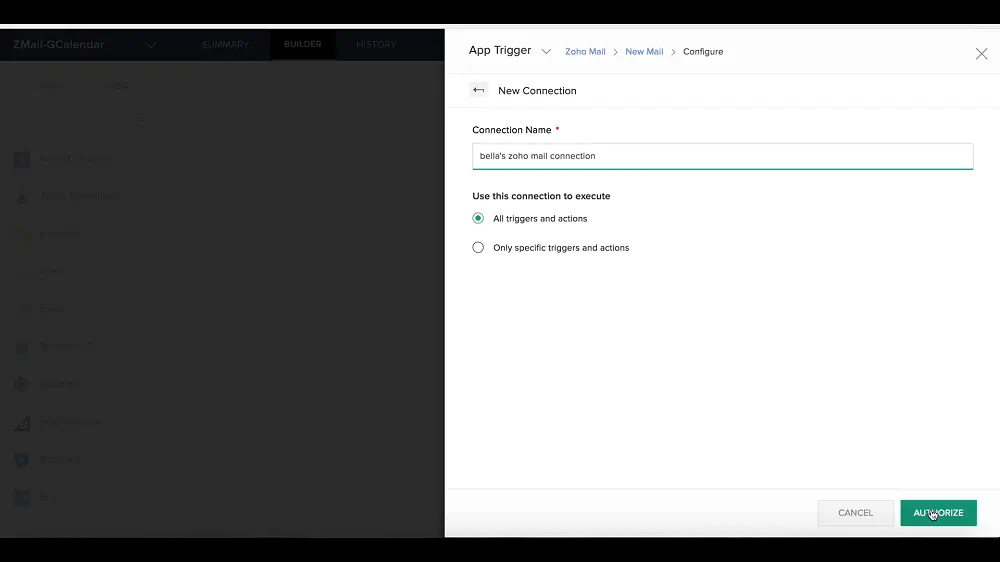
Note: To proceed, you will need the API key and base URL of your WordPress website.
Step 4: Find the API Key
- Log in to your WordPress account and click ‘Zoho Flow’ on the sidebar menu.
- Select the desired plugin, like WP Forms, for example.
- Then click on ‘+ new API key.’


- In the Zoho Flow, enter the key in the API key field through copy and paste functions.
Step 5: Find the Base URL of Your WordPress Website
- Open a new browser tab and log in to the admin dashboard of your WordPress account.
- On the left panel, go to ‘settings’ and click on ‘general.’
- Copy the URL from the ‘site address,’ omitting the last ‘/,’ and paste it into Zoho Flow’s ‘base URL field.’
- Click ‘authorize.’
Note: Zoho Flow will not support non-secure URLs. Also, if your version is v1.5.0 or higher, then you will be able to access the WordPress base URL directly from the API key page.

Supported Triggers and Actions
Triggers and actions are required to integrate Zoho CRM with WordPress. While a trigger initiates the flow, actions are a series of automated tasks that follow the trigger.
Some of the most commonly used triggers and actions in Zoho Flow are:
Triggers
- Comment Posted or edited: With this trigger, a notification is sent each time a new comment is posted or an existing comment is edited on your webpage.
- Post Created or Updated: With this trigger, a notification is sent when a new post is created or updated on your webpage. This trigger can also lead to spreadsheets being updated.
- User Added or Updated: This trigger helps you add new users to your CRM and newsletter list and update their details in your user database.
Actions
- Create Post: This automates the creation of new posts when content is added to your spreadsheet, online storage, or any document using this action.
- Create User: This action creates new users from your chats, mail, and other sources.
- Fetch Users: With this action, you can use the unique identifier to get more details about an existing user.
- Update Templated User: This action modifies every aspect of a WordPress templated user that has already been set up.
- Update User: This action modifies the details of an existing user.
Wrapping Up
Use our comprehensive guide to effortlessly integrate Zoho CRM with WordPress. Enhance lead management, streamline data flow, and ensure seamless customer interactions to elevate your online presence, drive business growth, and boost revenue.


